Holiday Gift Bags and Boxes
Today I am going to share my new Holiday gift bags and boxes!
Let's begin with my Elf Foot Stocking Bag!
This bag comes sized at approximately 6-3/4" x 5" x 1-3/4" when finished but can be sized larger or smaller to fit your needs. The file comes with the box base, the mats, the stocking pieces, the shoe pieces, the decorative cuffs and the bells so that you can make each side of the box decorative. The box base comes with holes so that you can string ribbon through. This bag would be perfect for holding pencils or markers, small candies, and so much more! This file is compatible with the 8x12 and 12x12 mats.

Here is the tutorial:

1. Cut out the box base. Fold on all the score lines then add adhesive to the side tab and bottom tab as shown.
2. Adhere the side tab to the other side of the box then pop up the box to form its shape.
3. Place adhesive on the bottom box.
4. Adhere the bottom closed.
5. Cut out all the decorative pieces and assemble.
6. Your pieces should look like this now!
7. Adhere the decorative piece on the box.
8. Your finished box will be similar to this! Add in your ribbon for handles and fill with goodies!
Next up is with my Holly Box!
This box is approximately 4-3/4" x 6-1/4" x 2-3/4" when finished and comes with the box base, the holly mats, the decorative holly cuts, the berry mats, and the decorative berries so that you can make each side of the box decorative. This box would be perfect for holding chocolates, candies, and so much more! This file is compatible with the 8x12 and 12x12 mats.

Here is the tutorial:
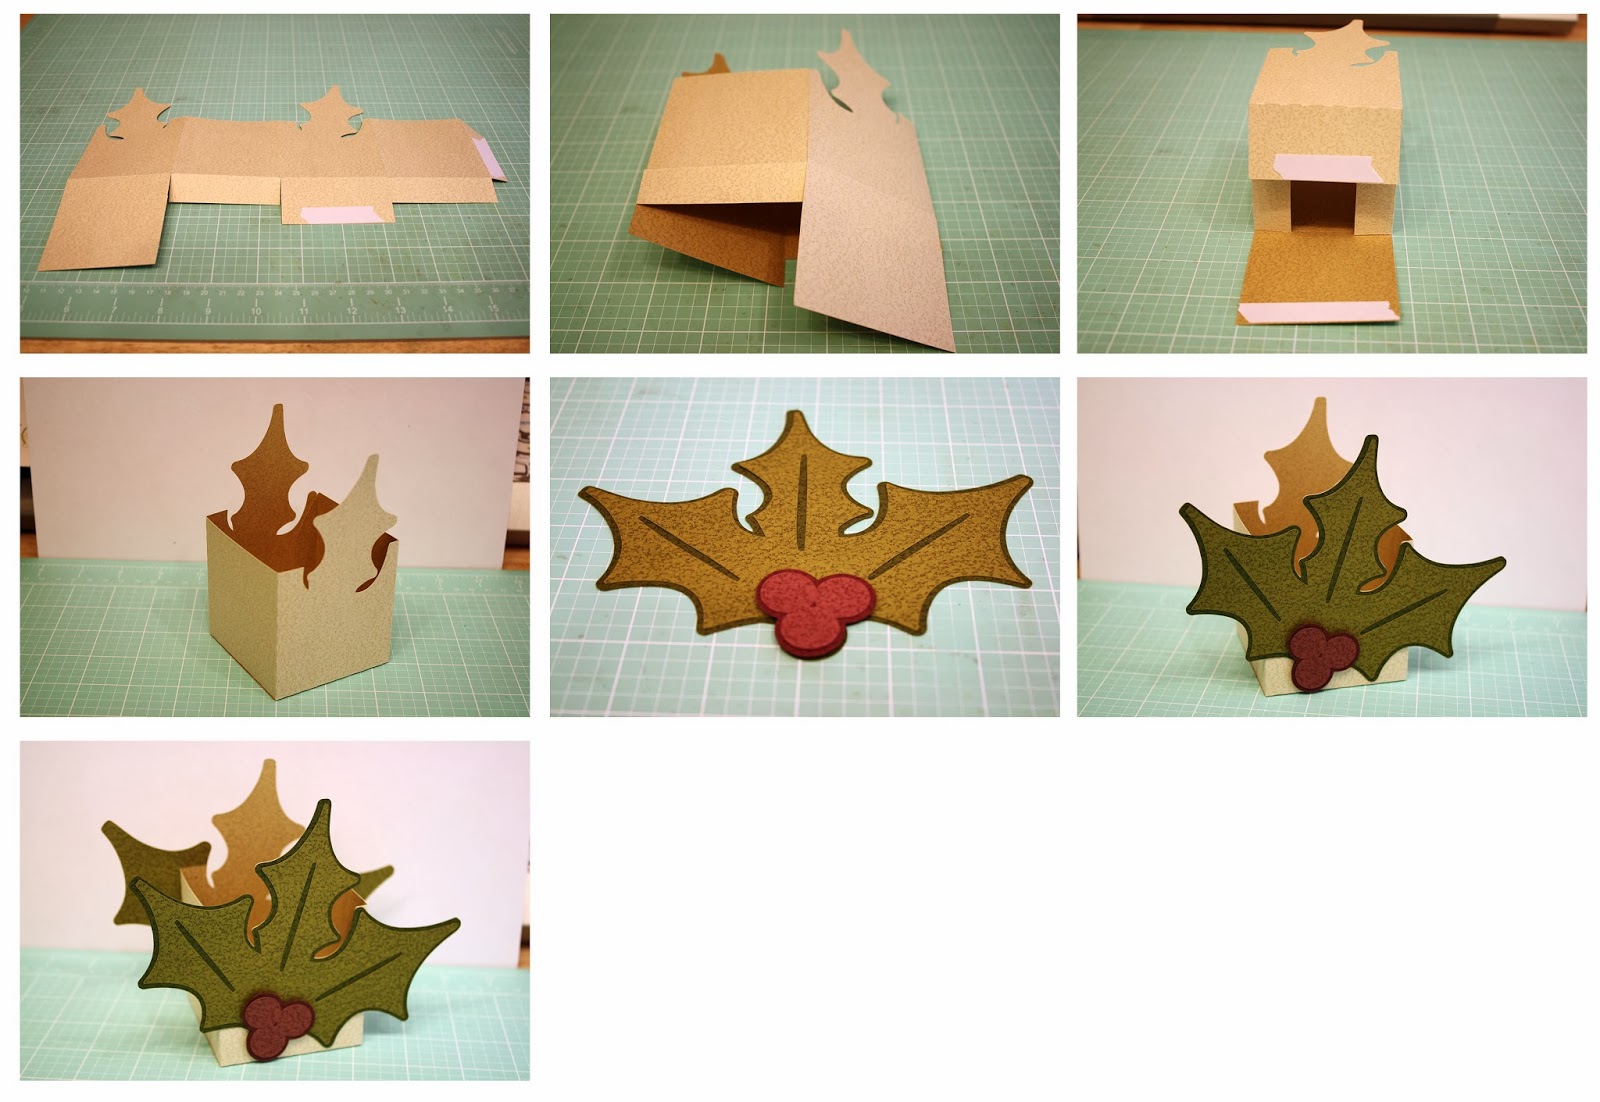
1. Cut out the box base. Fold on all the score lines then add adhesive to the side tab and bottom tab as shown.
2. Adhere the side tab to the other side of the box then pop up the box to form its shape.
3. Place adhesive on the bottom box and adhere the bottom closed.
4. Your box should look similar to this image now.
5. Cut out all the decorative pieces and assemble (you will have one for each side).
6. Adhere the decorative piece on the box.
7. Your finished box will be similar to this!
This is my new Mitten Box!
This box is approximately 6-1/4" x 4-1/4" x 2-3/4" when finished and comes with the box base, the mittens, the decorative cuffs, the buttons, and the snowflakes so that you can make each side of the box decorative. This box would be perfect for holding small cookies, chocolates, candies, and so much more! This file is compatible with the 8x12 and 12x12 mats.

Here is the tutorial:

1. Cut out the box base. Fold on all the score lines then add adhesive to the side tab and bottom tab as shown.
2. Adhere the side tab to the other side of the box then pop up the box to form its shape.
3. Place adhesive on the bottom box and adhere the bottom closed.
4. Your box should look similar to this image now.
5. Cut out all the decorative pieces and assemble (you will have one for each side).
6. Your pieces should look like this now.
7. Adhere the decorative pieces on the box.
8. Your finished box will be similar to this!
And finally, this is my new Snowman Window Box!
This box is approximately 6-3/4" x 6-1/4" x 2-3/4" when finished and comes with the box base, the clear mat cuts, the snowman base, and the decorative snowman cuts so that you can make each side of the box decorative. This box would be perfect for holding small cookies, chocolates, candies, and so much more! This file is compatible with the 8x12 and 12x12 mats.

Here is the tutorial:

1. Cut out the box base. Fold on all the score lines. Cut out the clear cuts and apply thin adhesive around their edges.
2. Adhere the clear cuts in place over the window cuts.
3. Adhere the side tab to the other side of the box then pop up the box to form its shape.
4. Place adhesive on the bottom box and adhere the bottom closed.
5. Your box should look similar to this image now.
6. Cut out the square insert and apply adhesive to the back.
7. Adhere the insert in the bottom of the box to hid the bottom flaps.
8-9. Cut out all the decorative pieces and assemble (you will have one for each side).
10. Place adhesive on the back of the decorative cuts.
11. Adhere the decorative pieces on the box lining up the window cuts.
12. Your finished box will be similar to this!
Tags:
3D
Bag
Bits of Paper
box
Christmas
Elf
Elf Legs
Elf Shoe
Gift Bags
Gift Box
Holiday
Holly
Jamie Cripps
Jamie Lane Designs
Mittens
Silhouette
Snowflake
Snowman
Tutorial


4 comments